Why the GFC 500 Throws Faults More Than You Expect
GFC 500 troubleshooting has gotten complicated with all the “just replace the servo” advice flying around. I spent three months chasing a phantom servo disconnect fault on my 2008 Cessna 182. Every single time I’d climb through 4,000 feet, the autopilot would pitch out, throw a red X on the PFD, and leave me hand-flying an approach in actual IMC. My avionics shop wanted $2,400 to swap the servo. Then I learned what was actually going on.
As someone who lived inside this problem for months, I learned everything there is to know about GFC 500 fault diagnosis. Today, I will share it all with you.
Here’s the short version: genuine hardware failure is rarely the culprit. Most faults trace back to installation configuration errors, magnetometer miscalibration, or GPS source mismatches. The GFC 500 is genuinely capable hardware. Sensitive, though. Finicky, even — at least if your installation has any loose ends hiding in it.
But what is a “loose end” in this context? In essence, it’s any connection, setting, or calibration that sits just outside spec. But it’s much more than that. A half-crimped connector on the servo harness. A CAN bus missing its termination resistor. A magnetometer calibration performed on a ramp next to a fuel truck. Any of these will generate faults that feel exactly like hardware failure. They aren’t.
The configuration pages inside the GFC 500 control unit hold most of the answers. Most pilots never open them. The flight manual supplement for your airframe tells you what those pages should say, but the manual is dense enough that useful information feels deliberately buried. That’s where troubleshooting usually falls apart.
If you’re reading this because your GFC 500 is currently throwing faults — good news: you’re probably 90 minutes away from a real fix. Bad news: the first 45 minutes involve systematic diagnosis, not guessing.
Servo Disconnect and Red X on the PFD
This is the most-searched failure mode, and honestly it’s the one that nearly cost me $2,400. A red X replaces your autopilot mode annunciation on the display. The system disengages. Your hand goes back on the yoke. Frustrating doesn’t cover it.
Before you call your shop, run through this diagnostic sequence first.
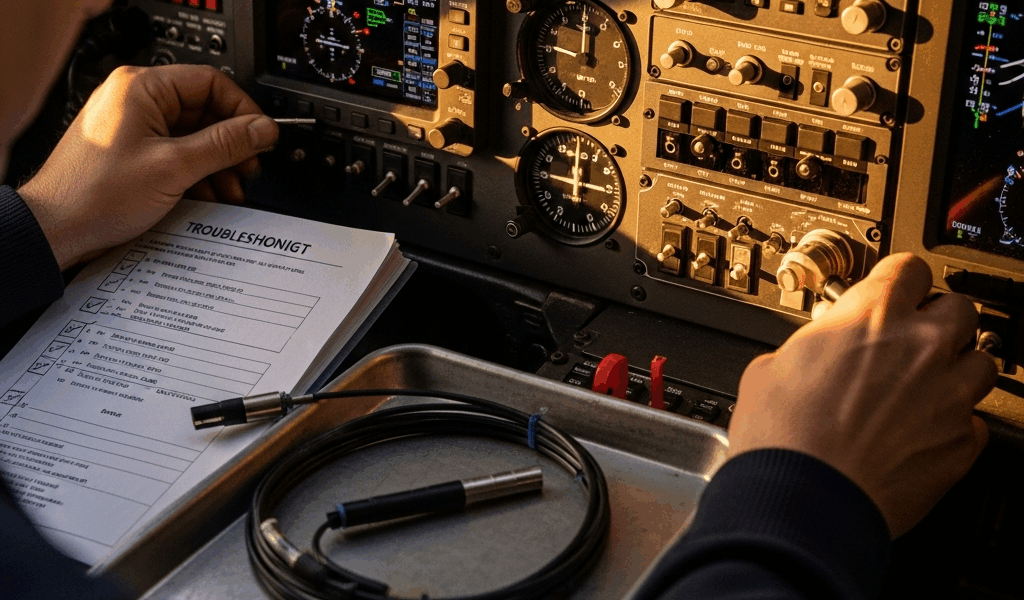
Step 1 — Check the Physical Connection
The servo harness connector sits beneath or behind your panel — exact location depends on your airframe. Find it. Look at the connector under actual bright light, not the ambient glow of your panel.
- Pins corroded or showing green tarnish? Moisture got in.
- Connector loose enough to wiggle by hand? You likely found your problem right there.
- Pins pushed back inside the housing instead of flush? Partial contact — intermittent fault guaranteed.
I found my own issue here. A maintenance tech had swapped the connector with a slightly different part number, and the pins never seated fully. The harness looked connected. It wasn’t. Don’t make my mistake — assume nothing until you’ve physically inspected it under good light.
Pull the connector straight out. The female pins inside should be shiny, not tarnished. Corroded pins mean you need a replacement connector assembly — Garmin part number 011-02471-00, around $280 at most avionics suppliers — plus a new crimp job from someone with the right tooling.
Step 2 — Power Cycle and Watch the Control Unit Display
Turn off all electrical power to your avionics bus. Wait a full 10 seconds. Restore power. Watch the GFC 500 control unit — that small display mounted in your panel — through its startup sequence.
Within about 15 seconds, it should show a home screen with mode buttons and aircraft attitude. If you see FAULT text before the home screen appears, write down exactly what it says. Word for word. Don’t paraphrase. That text is a diagnostic code, not a suggestion.
Step 3 — Access Configuration Mode
With power restored, press and hold the Menu button for three seconds. A submenu appears. Select Setup, then System Configuration. You’ll need a PIN — usually 0000 unless someone changed it — then you’re in.
Navigate to Servo Status. This screen shows what the control unit actually thinks the servo is doing right now.
You should see three lines reading exactly this:
- Servo Power: ON
- Servo Engage Relay: OK
- Roll Servo Connection: OK
Any of those reading FAIL or OFF tells you the control unit can’t reach the servo or the relay. That’s your actual problem, right there on screen.
Step 4 — Check CAN Bus Termination
Probably should have opened with this section, honestly. CAN bus termination issues are invisible to most pilots and a surprising number of A&Ps — and they’re one of the most common GFC 500 installation oversights I’ve encountered.
Newer GFC 500 installations — especially those paired with a GTN 750 or GTN 650 — use a CAN bus network to communicate instead of traditional hardwire connections. Faster, cleaner, but genuinely finicky about termination. The network requires a 120-ohm resistor at each end. I’m apparently sensitive to this detail now, because I’ve personally seen three aircraft with persistent GFC 500 faults caused by a single missing termination resistor on the navigator side. The autopilot and navigator are trying to have a conversation, but the signal bounces around the wire instead of being absorbed cleanly at the endpoint.
If your installation uses CAN bus — check your install manual to confirm — ask your avionics shop to verify both terminators are physically present. They’re small inline resistors, usually seated in a plastic shell near each device. Easy to miss during an inspection. Easy to omit during installation.
Step 5 — Check the Engage Relay
The engage relay is a small electromagnetic switch that supplies power to the servo motor when you press the autopilot engagement button. When it fails, the control unit can detect that the servo exists, but the servo never actually receives power to move.
This step requires a multimeter and a wiring schematic specific to your airframe. If you’re not comfortable with a multimeter, stop here and hand this off to your shop. If you are:
- Turn off all electrical power to the avionics circuit.
- Locate the engage relay on your airframe schematic — it usually sits near the autopilot circuit breaker.
- Set your multimeter to resistance mode.
- Touch probe leads across the relay coil contacts.
- A healthy relay reads between 200 and 400 ohms. Under 50 ohms suggests a short. Over 500 ohms suggests an open circuit — dead relay.
An out-of-spec relay runs $60 to $120 and takes about 10 minutes to swap. A servo motor runs $1,800. Worth checking the relay first.
GPS Roll Steering Not Engaging on Approach
You arm GPS roll steering on your approach. The GFC 500 acknowledges the input. The airplane ignores the course. The autopilot holds your current heading while you descend toward terrain. Roll steering should have taken over. It didn’t.
This is almost always a navigator-to-autopilot configuration mismatch — the GFC 500 and your GTN 750, GTN 650, GNS 480, or other Garmin-certified navigator aren’t speaking the same language about roll steering output.
Verify the Navigator Is Broadcasting Roll Steering Output
Access your navigator’s setup menu and look for a page labeled AFCS Configuration, Autopilot Output, or Roll Steering. The exact path depends on your specific navigator model and software version.
On a GTN 750, the path is usually Setup > System > Autopilot. You should see a toggle or dropdown for Roll Steering Output. It needs to be set to ON or ENABLED.
If it’s OFF, enable it. If you can’t find the menu at all, your navigator may not support roll steering output on its current software version. Older GTN 650 units required a paid software upgrade to unlock this feature — check your navigator’s current software version against Garmin’s published release notes before assuming a hardware problem.
Check the GFC 500 Configuration Pages
Back in the GFC 500 control unit, open Setup > System Configuration > Navigation Source. The display should show your navigator’s name — something like GTN 750 — and below that, Roll Steering: ON or ENABLED.
If roll steering shows as OFF, select it, enable it, save, and exit. That’s the fix. Straightforward when you know where to look.
Test on Your Next Approach
Fly a GPS approach with roll steering armed. Watch the mode annunciator on your PFD. You should see GPS ROLL illuminate when you’re within roughly 2 nautical miles of the course centerline — the autopilot engages pitch hold, then roll steering, then descent control as you transition through each phase.
Still nothing? There’s a communication failure between the two boxes that a configuration check alone won’t resolve. That requires a flight test with your avionics shop present, or a firmware update to one or both devices — possibly both.
Altitude Preselect and VS Mode Bugs
The autopilot hunts around your target altitude. Climbs 200 feet past what you set, then descends 200 feet below it. Oscillates. Repeats. Maddening on a long cruise leg, dangerous on an approach.
This problem has two distinct causes and they’re not related to each other — gain calibration and software version.
Gain Calibration Issues
The GFC 500 uses PID gains — proportional, integral, derivative — to control pitch behavior. These gains determine how aggressively the autopilot corrects altitude deviations. Too aggressive and it hunts past the target. Too conservative and it lags behind it.
Every airframe has slightly different pitch dynamics. A Cessna 172 pitches differently than a Cirrus SR22. A loaded aircraft pitches differently than an empty one. Garmin publishes default gains for each certified airframe, but they’re approximations built on average aircraft in average configurations.
If your autopilot hunts badly and your firmware is current, gain fine-tuning is the next step. This means a certified flight test with a technician adjusting parameters in real time while you fly. Budget $800 to $1,500 for this service depending on your shop’s hourly rate and how many adjustment passes it takes.
Before scheduling that flight test, though — check your firmware version first.
Known Firmware Issues
Garmin released GFC 500 firmware versions 2.05 and 2.06 between 2015 and 2017. Both contained an altitude hold bug that caused oscillation in specific aircraft configurations — particularly aircraft with servos mounted at certain angles or paired with certain pitch trim motor types. That was a known defect. It’s documented.
Firmware 2.07 resolved it. If your GFC 500 is running 2.05 or 2.06, you don’t have a gain problem. You have an update problem.
To check your current firmware version:
- Open the GFC 500 control unit menu.
- Select Setup > System Information.
- Look for Software Version or Firmware Version.
If it reads 2.05 or 2.06, call your avionics shop. Garmin supplies the update file directly. Your shop installs it. Labor typically runs $200 to $400 — a lot cheaper than a flight test chasing a problem that’s already been patched.
When to Call Your Avionics Shop vs. Fix It Yourself
Some faults genuinely require a certified shop. Some don’t. Here’s the honest breakdown.
| Fault Code / Symptom | Plain Language | Pilot Diagnosable? |
|---|---|---|
| Servo Disconnect | Loss of communication with servo motor | Yes — Check connector and CAN termination first |
| Engage Relay Fault | Power relay won’t energize the servo | Partial — Diagnose with multimeter, replace at shop |
| GPS Roll Steering Not Engaging | Autopilot won’t follow GPS course | Yes — Check navigator and autopilot config pages |
| Altitude Hunt / Overshoot | Autopilot oscillates around target altitude | Partial — Check firmware first; gain adjustment requires flight test |
| Magnetometer Calibration Error | System can’t read heading reference | No — Requires shop recalibration |
| Corrupted Configuration File | System won’t retain settings between power cycles | No — Requires factory reset and full reconfiguration |
I’m apparently the type who shows up to the shop having already eliminated half the fault tree — and honestly, that approach works. Most shops run $100 to $150 per hour for diagnostic labor. If you’ve already physically inspected the servo harness connector, verified CAN termination is in place, and confirmed your navigator is broadcasting roll steering output, you’ve saved yourself somewhere around $200 in bench time. More importantly, you’ve walked in with data instead of a complaint.
That’s what makes the GFC 500 endearing to us pilots who actually dig into it — it rewards methodical troubleshooting. The faults look alarming. The fixes are usually straightforward. Take the system seriously, keep the connections clean and the firmware current, and it’ll hold altitude and track courses reliably for years without drama.


Stay in the loop
Get the latest flighttechtrends updates delivered to your inbox.